App logo
Microsoft Dynamics 365 Connector for Jira Documentation
Quick, visual guide

Admin setup: Configure Dynamics connection

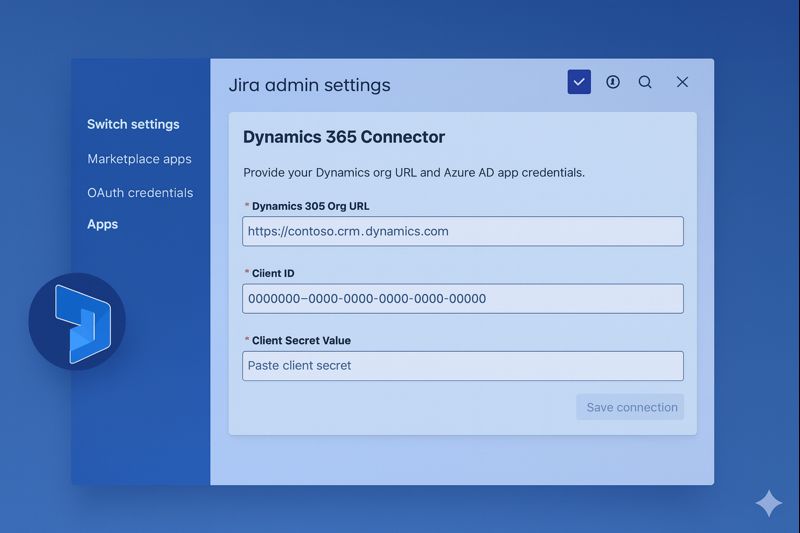
Connect Jira to your Dynamics 365 environment using your Azure AD app credentials.

1
Open Jira admin settings → Apps → Microsoft Dynamics 365 Connector
Find the app under Marketplace apps.
Navigate to the connector screen to begin configuration.
Screenshot: Connection configuration1.png
Connection configuration screen
Enter your Dynamics org URL, Client ID, and Client Secret to establish the connection.
2
Save connection
Once saved, the app confirms the connected state.
After successful authentication, you'll see a CONNECTED status and connection details.
Screenshot: Connected status2.png
Connected status screen
Connection details are visible and can be revoked at any time.
3
Revoke connection (optional)
Immediately disconnect Jira from Dynamics.
Use Revoke Connection to stop all Dynamics calls from Jira until reconnected.
Screenshot: Revoke connection button2.png
Revoke connection button
Revoking the connection does not delete your Connected Items—reconnect later and they remain.

Admin setup: Create Connected Items

Map Jira projects to a Dynamics module + entity, and choose which fields to display in Jira.

Connected Item = Jira project mapping Each Connected Item controls what users can link inside Jira for a given project (module, entity, and visible fields).

1
Open “Connected Items Configuration”
Click Create Connected Item.
The configuration table shows existing mappings (if any), plus actions for edit/delete.
Screenshot: Connected Items list3.png
Connected Items list and create button
Use the list to manage mappings and ensure only relevant projects expose Dynamics data.
2
Fill out the Create Connected Item form
Select Jira projects, Dynamics module, entity, and fields.
In the popup:
  • Name – friendly label users will see in Jira.
  • Jira projects – one or more projects that use this mapping.
  • Dynamics module/product – e.g., Dynamics 365 Sales.
  • Dynamics entity – e.g., Leads, Contacts, Accounts.
  • Fields – choose the fields to display in Jira once linked.
Screenshot: Create Connected Item4.png
Create Connected Item popup
The selected fields become the “at-a-glance” record view in Jira issues.
3
Edit or delete existing items
Update mappings as projects and entities evolve.
Use the actions column to modify or remove mappings:
  • Edit – change fields, rename the Connected Item, or target different Jira projects.
  • Delete – remove the mapping from the project(s).
Screenshot: Connected Items list actions3.png
Connected items actions
Admins stay in control—users only see the Connected Items configured for their Jira project.

Next: Use it in Jira issues Once Connected Items exist, the Issue Panel appears in relevant projects and users can link records.
Continue to Issue panel